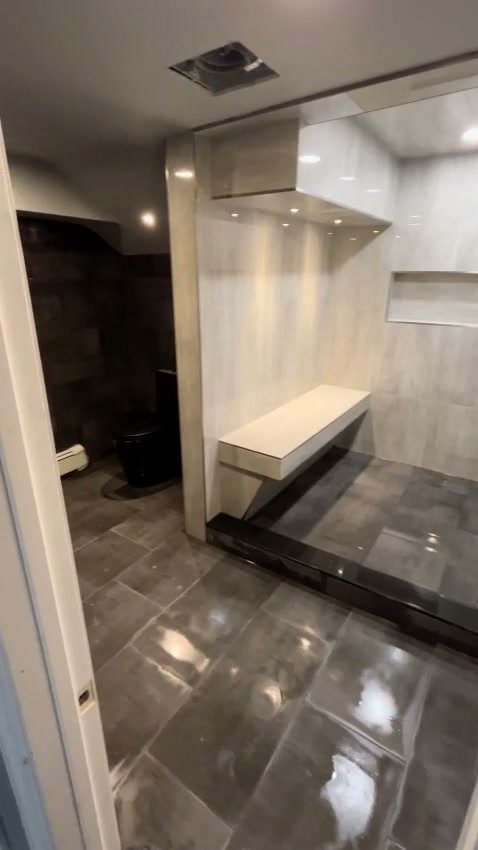
Curbless showers are one of the most requested features in bathroom remodels right now, and for good reason. There is no lip to step over, the room looks bigger, and the same floor can be used by a kid, a grandparent and someone in a wheelchair without changing anything. On a house built on a concrete slab the question comes up immediately: how do you slope a floor that is already poured?
This post explains the two ways we handle that in a bathroom remodel on a slab house, what the drain and waterproofing have to do, and what to expect if you own one of the many slab ranches in Centereach, Selden, Lake Ronkonkoma and the surrounding hamlets.
The basic problem
A conventional shower sits in a pan with a curb. The curb lets the shower floor be sloped and sit a little below or above the bathroom floor without anyone caring, because the curb is the boundary.
Take the curb away and the shower floor has to meet the bathroom floor at exactly the same height along that edge, then fall toward the drain from there. Inside the shower you need enough slope to move water, and that slope has to be lower than the bathroom floor at the drain. On a framed floor, a carpenter can drop the joists or recess the subfloor in the shower area to gain that depth. On a slab, there is nothing to drop. The concrete is the floor.
So you have two choices: go down into the slab, or come up everywhere else.
Option one: recess the slab
Recessing means saw-cutting the slab around the shower footprint, breaking out the concrete, lowering the soil or gravel below, and pouring a new section of slab that sits lower than the surrounding floor and already slopes toward the drain. The drain line is set in the ground at the same time.
This is the cleaner result. The bathroom floor stays where it is, door thresholds and the transition to the hallway do not change, and the shower floor can be tiled in the same plane as the rest of the room. It is also the method that lets us put the drain anywhere we want, including moving it to a wall for a linear drain.
What it involves:
- Scanning the slab before cutting. Older slab houses often have the main drain line, water supply or electrical conduit running under the bathroom, and some have radiant heating tubing in the slab. We scan first.
- Saw-cutting with water control and dust control, because this is inside your house.
- Removing the broken concrete and excavating the base to the new depth.
- Running or rerouting the drain line with proper fall and tying into the existing waste line. On many ranches the shower drain can connect to the nearby tub or toilet line, but every house is different.
- Compacting the base, placing a vapor retarder as appropriate and pouring the new recessed section, often with a pre-slope already formed in the concrete toward the drain.
- Letting that concrete cure before waterproofing goes on. The membrane manufacturer sets the minimum cure time and moisture conditions, and skipping that step is how membranes fail.
Plumbing work of this kind usually needs a permit and inspection. Check with the Town of Brookhaven Building Division, or your village if you are in one, before the slab is opened.
Option two: build up the rest of the floor
If cutting the slab is off the table, the alternative is to leave the shower area at slab level and raise the floor in the rest of the bathroom. A mortar bed or a layered underlayment brings the bathroom floor up enough that the shower floor, sloped from the raised edge down to a drain at slab level, has the fall it needs.
This avoids cutting concrete and keeps the existing drain location if it works. The trade-offs are real, though. The bathroom floor is now higher than the hallway floor, so there is a step or a ramp at the door. The toilet flange has to be extended. The vanity, baseboards and door bottom all move up. In a small bathroom this can be fine. In a bathroom meant for someone using a walker or a wheelchair, a step at the door defeats the purpose of a curbless shower.
Some manufacturers also make very thin pre-sloped foam pans and low-profile drains designed to minimize how much the surrounding floor has to come up. They can be a good middle path. Follow that system's instructions exactly, because mixing components from different systems is where the warranties disappear.
Drain choice
The drain decides how the floor is shaped.
A center point drain needs the floor to slope toward it from every direction. That works with mosaic tile that can follow the compound curves, but it fights large-format tile, which cannot bend. If you want big tiles on the shower floor, a point drain is a hard road.
A linear drain sits along one edge, usually against the back wall or at the entry side. The floor then slopes in one flat plane toward it. Large tiles lay flat, the slope is easy to see and check, and the entry edge can be dead level with the bathroom floor. For curbless work on a slab, a linear drain against the wall with a recessed slab is the combination we reach for most often.
Whatever the drain, size it for the showerhead. A big rain head or multiple body sprays put down a lot of water, and a drain that cannot keep up puts a puddle on the bathroom floor.
Slope and waterproofing
The slope inside the shower is set by plumbing code and by the membrane and tile manufacturers. The commonly referenced minimum is a quarter inch of fall per foot toward the drain. Confirm the requirement that applies to your job with the Building Division and the product instructions, and do not go below it.
Waterproofing is where curbless showers either last or fail. Because there is no curb, water can and will travel beyond the shower footprint, so the waterproofing has to as well. The general practice is:
- A bonded waterproofing membrane, either sheet or liquid-applied, over the sloped substrate and up the walls, following the manufacturer's overlap and corner details.
- The membrane extends well past the shower onto the bathroom floor, often across the whole room in a small bath.
- The drain is a bonding-flange type made to be integrated with the membrane, not a traditional clamping drain meant for a mortar bed and liner.
- A flood test before tile, per the membrane maker's method.
Products from different manufacturers are not interchangeable at the drain connection. Pick one system and follow its install guide.
Controlling spray without a curb
A curb also keeps spray in. Without one, you manage water with the room layout. A fixed glass panel on the open side, the showerhead pointed away from the opening, and a slight fall across the whole bathroom floor toward the shower all help. Many curbless bathrooms are designed as wet rooms where the entire floor is tiled and waterproofed. That is a legitimate design, and it is easier on a slab than on a framed floor.
What slab ranches in this area usually present
Many of the ranches and capes built in the 1950s and 1960s across Centereach, Selden and Lake Ronkonkoma are slab-on-grade with a single bathroom in the middle of the house. The common conditions we find:
- A cast iron tub with a drain that can often be reused for a shower in the same location, which keeps the plumbing work small.
- A waste line under the slab that runs in a direction we can predict but must still confirm by scanning or by opening a small test area.
- Floors that are not level across the room, which affects how the curbless edge lines up.
- No vapor barrier under the original slab, which matters for the membrane and flooring choices.
None of these stop a curbless shower. They just need to be known before the demolition starts, which is why we look at the slab before we quote. If you are weighing this remodel alongside other projects on a slab house, read why a foundation-up general contractor matters for how we think about the whole building, and see concrete countertops in a kitchen remodel if the kitchen is next.
Planning a curbless shower or a full bathroom remodel in a slab house in Centereach or the surrounding Brookhaven hamlets? Call or text JDG Concrete & Construction at (631) 672-1618 or request a quote. We will check the slab, talk through recess versus build-up for your layout, and give you a written scope.
Frequently asked questions
Can you build a curbless shower in a house on a concrete slab?
Yes. The floor inside the shower has to slope to the drain while the floor outside stays flat at the same level, so the shower floor either gets recessed into the slab or the rest of the bathroom floor gets raised. Both approaches work. Which one fits depends on the slab, the drain location and the door thresholds.
Does the slab have to be cut to move the drain?
If the drain moves or the shower floor is recessed, yes. The slab is saw-cut and chipped out in the shower area, the drain line is rerouted in the ground below, and new concrete is poured to the new level. Scan the slab first for pipes, conduit or radiant tubing before cutting.
Is a linear drain required for a curbless shower?
No, but it makes the job easier. A linear drain along one edge lets the floor slope in a single plane toward it, which keeps large-format tile flat and makes the transition to the bathroom floor cleaner. A center drain works too, but the floor has to slope from four directions.
Where does the water go if there is no curb?
Into the drain, if the floor is sloped correctly and the waterproofing extends past the shower onto the bathroom floor. A gentle fall across the whole bathroom toward the shower, a glass panel or partial wall to control spray, and a drain sized for the showerhead flow are what keep water where it belongs.